Rustic Red Fife Whole Grain Bread

introduction
Taxed to come up with a 100 percent whole grain country loaf using Anson Mills Rustic Red Fife Bread Flour, we were doubtful—very doubtful, frankly—we’d ever come up with anything quite as elegant as a simple French country loaf made with unbleached white flour. White flour is far farris non grata around Anson Mills where whole grains rule, but we’re actually pretty fond of it. Freshly milled and screened, white flour is a baker’s best friend. It’s fine, easy to knead, reliable, and capable of producing bread with a gloriously open, moist golden crumb, clean, sweet flavor, and a shattering crisp crust, even at home.
But we don’t wish to malign whole grains: whole grains are simply whole kernels, so every part of their seed architecture—bran, germ, endosperm—is preserved in the milling process, and left in the flour. That means fiber, micronutrients, nutrition, flavor. These are good things, right? Well, yes, but even good things can spell problems for the baker. That fabulous fiber in the bran (that bran, which, if we’re honest, can taste a tad bitter) interferes with carbon dioxide production in the dough and compromises its rise. Many of us have baked whole grain breads that reflect this problem: breads coarse of crumb and diminished in stature, breads that stale within hours. And despite the fact that Anson Mills Rustic Red Fife Bread Flour is an outstanding bread flour, that’s just what was happening to us.
We’d probably still be rubbing dough from our fingers and swearing were it not for the insight and instruction of Peter Reinhart in his book, Whole Grain Breads (Ten Speed Press, 2007). When we finally got our hands on this book and started reading it—deep into the disappointment phase of our baking trials—we were flooded with the relief of finding someone who had experienced our problems personally, solved them, and would teach us to do the same. A diagnosis and a cure all at the same time.
Not to get super specialized about details of Mr. Reinhart’s research and its outcomes—which is long-ranging, far-reaching, and decades deep (plus, you can always buy the book)—suffice it to say that Mr. Reinhart finds a way to capture “the full potential of flavor trapped in whole grain.” He does this by creating conditions favorable to enzymatic activity (and essential for flavor development in whole grain breads) with the parallel creation of two small doughs, or “preferments,” and delayed fermentation techniques. First, a firm starter dough (which he calls a “soaker”) of flour, water, and salt, but no yeast, is mixed together and rests at room temperature for 24 hours. Once moist, enzymes in the soaker-starter become active, hastening the conversion of amylase, a starch closely associated with flavor, to amylose, a sugar. This conversion sweetens the grain mixture prior to baking and produces other enymatic compounds that promote flavor development during the baking process itself.
In conjunction with the soaker, Mr. Reinhart makes a second firm dough, this one containing flour, water, and a small amount of yeast, and refrigerates it for 24 hours—a process that allows fermentation flavors to develop, but prevents the yeast from dying of exhaustion. Longer fermentation times—required to get under-yeasted doughs up to speed—signal a complex set of enzymatic activities at work in the dough. In a dough with minimal yeast, the yeast depletes available sugars in the flour after a couple of hours and is forced to seek fresh sustenance by converting damaged starches (produced in the milling process) to sugars. The longer it takes a dough to rise, the more interesting the fermentation flavors become—and the more interesting the flavor of the bread itself.
On the second day, the two doughs are combined, given a fresh infusion of yeast, a bit of flour, and some salt, and mixed or kneaded like regular bread dough. The activated enzymes in each give the final dough a big jump in terms of flavor and an extra lift when the bread hits the oven. It is a technique that produces a phenomenal loaf of whole grain bread: moist, richly flavored, and nicely lofted with a deep, crisp-chewy crust.
In many respects, our final recipe sticks closely to Mr. Reinhart’s. But Anson Mills Rustic Red Fife Bread Flour, like all quirky new crop heirlooms, hydrates differently than other whole grain flours. Less water is required, and the dough takes longer to absorb it. We were forced to cut back on the amount of yeast in the final dough—the Red Fife flour must have made the yeast giddy with appetite because the dough kept overproofing. We trimmed back the yeast and increased the proof times.
A final comment on this bread: in our head to head trials with other first class whole grain flours to assess flavor and performance, Anson Mills Rustic Red Fife Bread Flour blew the competition away. We were a bit surprised, actually—it wasn’t even close.
Baking Notes
Once the two preferments get together in the mixer, they become one sticky dough. This dough doesn’t relinquish its stickiness easily with additional kneading or by throwing more flour at it. The 2 tablespoons of olive oil help to some degree—and though Mr. Reinhart suggests adding it to increase aeration, we like the results either way. The best approach to stickiness management is using wet hands to handle the dough.
Stickiness notwithstanding, Red Fife is a bread flour and this is a muscular dough. It needs to be kneaded by machine—not by hand—to fully develop the flour’s gluten. If the dough feels especially taut and tough when you pull it from the mixing bowl, wet your hands and knead the dough a few times in succession on the counter to hydrate the dough and make it more supple.
The gluten window we mention in the body of the recipe signals the strength and extensibility of the dough. You can test this by pulling up a bit of dough between the thumb and forefinger of each hand and stretching it. When the dough is properly kneaded, it will stretch into a membrane thin enough to see through. This is the gluten window.
Working with a number of bread doughs recently, we fell in love with the utility and aesthetic of a coiled cane proofing basket known as a brotform. Sprinkled inside with flour, a brotform cradles the dough during its final rise, helping wetter doughs retain their shape. Unmolded just before baking onto a parchment-lined pizza peel or inverted sheet pan, the coiled design of the brotform leaves beautiful tracings on the dough. You can fabricate your own proofing basket—albeit one minus the design—by lining a 1½-quart mixing bowl with a clean linen napkin. Let the edges of the napkin drape over the rim of the bowl, and then secure the napkin by tying a length of kitchen twine around the bowl’s circumference. Flour the inside of the bowl generously and shake out the excess.
equipment mise en place
For this recipe, you will need a digital kitchen scale; two small mixing bowls; a wooden spoon; a stand mixer with the dough hook attachment; a pizza stone; a clean unglazed terra cotta pot about 10 inches in diameter, its bottom hole plugged with foil; a plastic dough scraper or large rubber spatula; an 8-inch brotform proofing basket or home-fabricated proofing basket described in Baking Remarks; a pastry brush; parchment paper; a pizza peel or baking sheet; long oven mitts; a baker’s lame or single-edged razor blade; an instant-read thermometer; and a wire cooling rack.
-
for the unleavened preferment:
-
8
-
½teaspoon fine sea salt
-
5ounces spring or filtered water, warm (about 105 degrees)
-
-
for the leavened preferment:
-
8
-
½teaspoon instant yeast
-
5ounces spring or filtered water, warm (about 105 degrees)
-
-
for the dough:
-
¾teaspoon instant yeast
-
2teaspoons honey or agave nectar
-
2tablespoons olive oil
-
⅝teaspoon fine sea salt
-
2
-
-
Make the unleavened preferment: Mix the flour and salt in a small bowl. Pour in the water and stir the ingredients with your fingertips or a wooden spoon until they form a shaggy dough. Knead the dough by hand in the bowl, wiping the sides of the bowl with the dough ball to clean them, and then turn the ball out onto the countertop. Knead the dough about 2 minute more; it will be smooth and tacky. Return the dough to the bowl, cover it loosely with plastic wrap, and let it stand at room temperature for 24 hours.
-
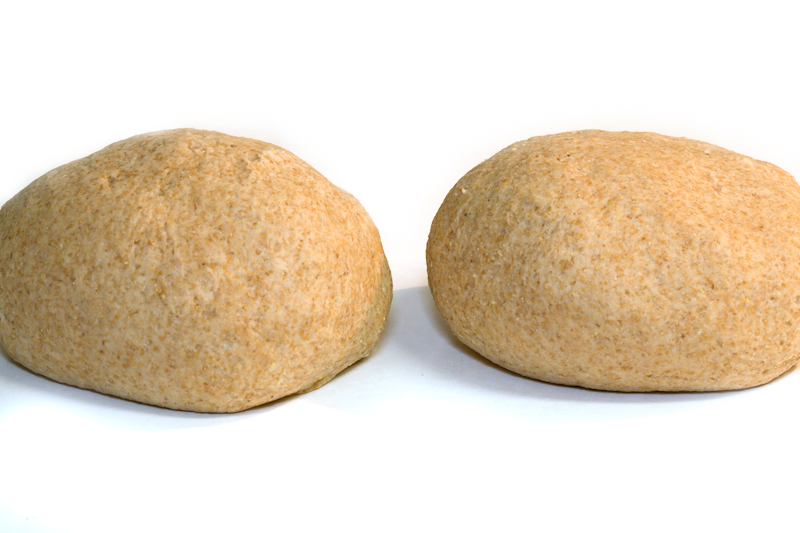
Make the leavened preferment: Mix the flour and yeast in a small bowl. Pour in the water and stir the ingredients with your fingertips or a wooden spoon until they form a shaggy dough. Knead the dough by hand in the bowl, wiping the sides of the bowl with the dough ball to clean them, then turn the ball out onto the countertop. Knead the dough until smooth and strong, about 5 minutes. Return the dough to the bowl, cover it loosely with plastic wrap, and refrigerate for 24 hours. Note: The two preferments look like identical twins (fig. 2.1).
-
Make the dough: After 24 hours, the unleavened preferment will smell sweet and look slightly sweaty from sitting up all night, but will not differ much visually from the day before. The leavened preferment, on the other hand, will look about 6 months pregnant. Remove the leavened preferment from the refrigerator and let it stand at room temperature for 2 hours before mixing the final dough.
-
After 2 hours, combine both preferments in the bowl of a stand mixer fitted with the dough hook attachment. Add the yeast, honey or agave, olive oil, and salt and mix on low speed until no yeast granules are visible and the dough is smooth and sinewy, about 5 minutes. Add the flour and continue to knead the dough on medium speed until it is strong and a small piece of it can be gently stretched with the fingers into a see-through gluten window (see Baking Notes), 15 to 20 minutes. Remove the bowl from the mixer. Wet your hands, pull the dough from the bowl and off the dough hook, and throw it on the counter. If the dough feels stubbornly taut, wet your hands and knead it 2 or 3 times to hydrate the dough. Return the dough to the bowl. Cover the bowl with plastic wrap and let the dough rise at room temperature until it doubles in size and looks spongy and pocked, about 2 hours and 45 minutes.
-
Adjust an oven rack to the lowest position; remove any additional racks. Place a pizza stone on the rack and set a large, clean terra cotta pot on the stone (don’t forget to first plug the hole in the pot with a small ball of aluminum foil). Heat the oven to 500 degrees.
-
Shape the dough: Using a plastic dough scraper or large rubber spatula, gently ease the risen dough from the bowl onto the countertop, leaving as much air in the dough as possible. Shape the dough into a rough ball. Cup both hands around the sides of the ball and drag its bottom against the counter, using friction to stretch and tighten the dough into a smooth, round ball (fig. 6.1). Turn the dough ball smooth-side down into a floured 8-inch brotform or home-fabricated 1½-quart proofing basket. Wet your fingers and pinch the seams of the dough to seal them (fig. 6.2). Brush the top of the dough with oil, then drape plastic wrap lightly over the basket and let the dough rise at room temperature until it appears light and airy and has risen close to the top of the brotform or bowl, about 1 hour and 15 minutes.
-
Bake the bread: Gently invert the brotform with the risen dough over a parchment paper–lined pizza peel or inverted baking sheet. Lift the basket off the dough. Using a baker’s lame or single-edged razor blade, slash an X into the top of the dough. Wearing long oven mitts, quickly pull the oven rack halfway out and transfer the pot from the stone to the open oven door. Slide the dough and its parchment from the pizza peel onto the stone and invert the pot immediately over the dough. Slide the rack back in, close the oven door, and reduce the heat to 450 degrees. Bake for 20 minutes. Remove the pot and continue to bake the bread until an instant-read thermometer inserted into the center of the loaf registers 190 to 200 degrees, about 5 minutes longer. The bread should be nicely risen and a dark russet brown. Using potholders, transfer the bread from the oven to a wire rack and let cool to room temperature.
-
-
2.1
-
-
-
6.1
-
6.2

-