Rough Puff Pastry
introduction
This formula, which was called “semi-puff pastry” when we learned to make it, is now broadly known as “rough puff,” the preferred English term for a technique that uses workarounds in butter lamination to achieve a counterfeit pastry with the height, flake, and flavor of classic puff pastry. As far as we know, “rough puff” rode into the American vernacular on the back of the Great British Baking Show , and we’ve grown fond of the term.
“Rough” describes this dough—formidably messy and crumbly in the early mixing and folding stages—to a tee. Fight back the panic! With turns, the dough becomes smooth and pliant, its results unimpeachable. A combination of pastry and fine bread flour produces a splendid pastry with the desired shatter factor and golden high-butter, light-grabbing glow.
Fully laminated, this formula is ready to go anywhere: into a turnover, a Napoleon, or a plain ole pie pan.
Baking Notes
European-style butter, which has a higher percentage of fat than average butter, is essential for the success of this recipe.
This process is MESSY. Have confidence it will come together (because it will) and resist the impulse to add additional water. The work surface needs to be smooth and flat—a tiled counter, for instance, would be a disaster with this dough.
equipment mise en place
For this recipe, you will need a digital kitchen scale, a medium bowl, two small bowls, parchment paper, a liquid measuring cup, a food processor, a metal or plastic bench scraper, a rolling pin, and a ruler.
-
-
7
-
5
-
9ounces cold unsalted European-style unsalted butter, cut into ½-inch cubes
-
Ice cubes
-
Spring or filtered water
-
Scant ⅝ teaspoon fine sea salt
-
-
Combine the flours in a medium bowl and put the butter into a small bowl. Cover both bowls and freeze until the butter is frozen solid, at least 45 minutes. Cut two 12 by 18-inch sheets of parchment paper and set them aside.
-
When you are ready to make the dough, drop several ice cubes into a liquid measuring cup and fill the cup with about 6 ounces of water; set aside to chill. Turn the frozen flours into a food processor, add the salt, and pulse a couple times to combine. Scatter the frozen butter over the flour and pulse until the butter is cut into the dry ingredients but still shows large pieces, about 15 one-second pulses.
-
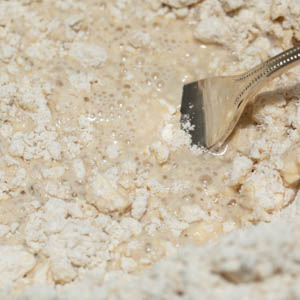
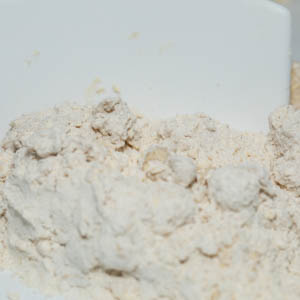
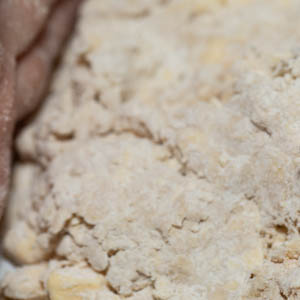
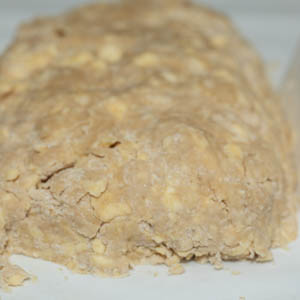
Turn the flour onto a clean work surface, gather it into a mound, and make a well in the center. Working quickly, weigh out 4 ounces of ice water (without cubes) into a small bowl and pour it into the well. Using a fork, gradually incorporate the flour-butter crumbs into the water (fig. 3.1), cupping your other hand around the mound to hold the structure of the “dam” together. When all the water has been incorporated, scrape off the bits stuck to the tines of the fork, then fluff and mix everything with your fingers. Using a metal or plastic bench scraper, chop and fluff the clumps (fig. 3.2), running the scraper across the mound a few times, then gather the straggly bits while also scraping the work surface. With the heel of one hand and short, firm, forward thrusts, smear the mixture against the counter, beginning with the area furthest away from you; work section by section until all the flour-butter mixture has been smeared. This technique, known as fraisage, will create layers of butter and flour that laminate and lift the dough. If a high proportion of dry, floury bits remain, sprinkle on additional ice water 1 teaspoon at a time and fluff it in with your fingers. Scrape the mass together once again, repeat the fraisage, and scrape the bits together a final time. The dough will feel dry, look crumbly (fig. 3.3), and hold together only roughly.
-
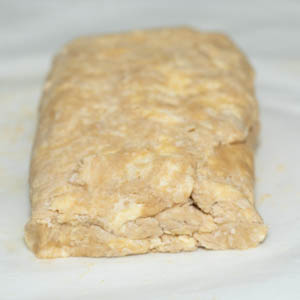
Using the scraper, transfer the mass to one of the parchment sheets, then use the scraper to block and press it into a 7 by 5-inch rectangle with a short side nearest you. Lay the second parchment sheet on top. Whack the rectangle a few times with a rolling pin to integrate the dough slightly, then peel off the top parchment and re-block the edges with the scraper. The dough will seem very crumbly. Replace the parchment and roll the dough into a rectangle 11 inches long by 7 inches wide, blocking the sides as needed. Lift off the top sheet of parchment and block the dough on the top and sides, pressing stray bits into the rectangle (fig. 4.1). Using the parchment sheet to assist, fold the top third of the dough down and the bottom third of the dough up (fig. 4.2). Lift the folded dough off the parchment and rotate it counterclockwise a quarter turn so the open end faces right, like a book (fig. 4.3). Replace the top parchment sheet and whack the dough with the rolling pin to even it, then block the top and sides. Flip the paper-and-dough package from top to bottom, so the open edge remains on the right. Repeat the rolling and folding process. This represents the first full set of turns. Wrap the top and bottom parchment tightly around the dough, set the dough on a small baking sheet, and freeze for 3o minutes.
-
Unwrap the dough, keeping one sheet of parchment on the bottom and the other on the top; position the rectangle with the open edge to the right. Without adding flour, roll out and fold the dough, blocking it as needed, as you did for the first set of turns. At the end of the second set of turns, the dough will have greater integrity and more compliance. Re-wrap the dough and freeze it for 30 minutes.
-
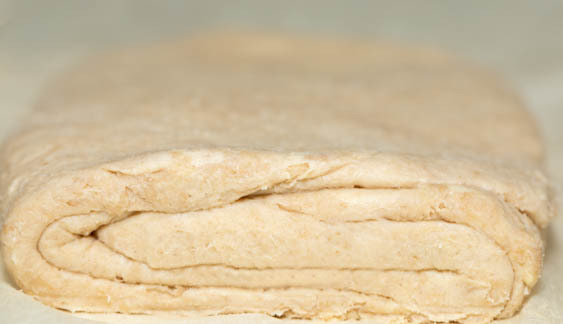
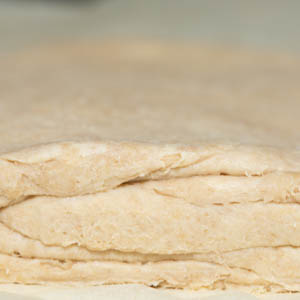
Repeat the rolling and folding process for the final time. You have now given the dough three sets of turns; it will look smooth and supple (fig. 6.1). Wrap it tightly in plastic wrap and refrigerate for at least 1 hour or for up to 2 days.
-
-
3.1
-
3.2
-
3.3
-
-
-
4.1
-
4.2

-
4.3
-
-
-
6.1
-